Aashish Singh Negi ...... The Pro

My photo
Mumbai/Rudraprayag, Maharashtra/Uttarakhand, India
Hello Friends, This is Aashish Singh Negi from Mumbai. I natively belong to Uttarakhand. I completed my engineering in Information Technology from Sinhgad Institute,Lonavla Of Pune University. I love Programming......... I know some programming languages like C,C++,Visual Basic,C#,SQL,etc. and work upon various technologies like ASP .NET,Silverlight 3.0,Silverlight 4 Beta, Microsoft Pivot, Photosynth,Deep Zoom, Azure Cloud Computing, etc. I love techno topic very much.Love to watch videos of new technologies(softwares,hardwares,etc) launched by different companies............
Showing posts with label microsoft. Show all posts

Monday, July 5, 2010

My HandsOn with Microsoft Pivot ( + Silverlight Viewer )

First of all i would like to thank Twitter because a tweet on twitter about World Cup Pivot inspired and sparked me try my hands on this awesome tool/application from Microsoft - Pivot.

i would like to remind you all of the great saying "a picture speaks a 1000 words .....". My Pivot collection also contains a number of pictures so rather than discussing about what Pivot is all about, i would like you all to visit the Sample Pivot Collection which i created and uploaded to my web server.

My Hands-On ...

You need to have "Pivot Viewer" installed on your computer to view this. The Pivot Viewer is available at http://www.getpivot.com/download/. There is a Silverlight PivotViewer also that is available for download at http://www.silverlight.net/learn/pivotviewer/. To view the Pivot Collection online you just need to have Silverlight Plug-In installed on your machine.

If you have downloaded the normal Pivot Viewer then you can open the "Microsoft Live Labs Pivot" application installed on your machine. After opening the above application you can put the following url to view my Pivot Collection http://pivotapp.aashishnegi.com/Sample.cxml.

If you have Silverlight installed on your machine, you can visit the Silverlight Version of my Pivot Collection at http://slpivot.aashishnegi.com/Default.html.

Now viewing the above links you must have understood that you can view the Pivot Collection by two ways.
  1. Using the Pivot Viewer installed on your machine and getting the url of the .cxml file.
  2. Using the Silverlight Pivot Viewer. I think this is a more better way as it allows me to view the Collection directly through the Browser making use of Silverlight's capabilities.
How was your experience with the Pivot ???

How you can create this ?

Now i will focus some light onto "Pivot" and then explain the simplest steps to create your own Pivot Collection and host it online as i did it.

You can get the details about Pivot at its Official Site.

now rather than discussing the details and introduction of Pivot, i will take you through the simplest steps you can follow to build up your own Pivot Collection. There are many ways to create the Pivot Collections.
  1. Command-Line ( http://www.getpivot.com/developer-info/cmd-line-tools.aspx )
  2. Excel Plug-In ( http://www.getpivot.com/developer-info/excel-tools.aspx )
  3. Just-In Time Pivot Collections ( http://www.getpivot.com/developer-info/jit-tools.aspx )
Here i will discuss the method of developing your Pivot Collection using the "Pivot Collection Tool for Microsoft Excel". You can download the Excel Plug-In from the following link http://www.getpivot.com/developer-info/download-excel-tools.aspx. You need to be online while installing the tool. Run the setup in the Downloaded Package.

After you have installed with the Excel Tool, you can see one more additional tab in your Microsoft Excel's Ribbon Bar. There is "Pivot Collections" tab that gets added. you can see the following picture which shows the tab.


You can see i have specified the Pivot Collections tab in the above image. Click on "New Collection" button on the upper left corner. U will get a new excel book window.

Click on "Import Images" button to select multiple images which you want to upload to the Pivot Collection. The images get added to your Collection. Now what just modify the cell values "Name", "Href", "Description" and you can even insert some new "Facets" - the columns which get displayed inside the "Facet Catagories" on lower left side of the "Pivot Viewer". I added "Place", "Pic Taken By" and "Date" as you can see in following image.


Now you can see the "Quick Preview" of your Pivot by clicking the "Quick Preview" button in the ribbon bar. You wouldn't get to see the images in the "Quick Preview" but you will get see all other characteristics such as Facet Catagories, Facets, Sort DropDown, Filter Panel, Info Panel, etc as shown in following image.


If you are ok with the preview, you are ready to hit "Publish Collection". The excel tool publishes the collection and you get following screen.


After its done with the publishing, you will see your collection opened in the "Pivot Viewer" ....


I did some more changes in the collection. What if i want to add multiple values to a single column. You can do it easily. Just separate the values with "double pipe" i.e. " || ". You can see in following image i created the column named "People" containing the multiple values.


I published it and you can see in following image the "Multiple Values" shown in the "Information Window".


What happens after we Publish the collection ?

After you publish the collection and select the location many of the files get created.

  1. The .cxml file which is an important file which we point and open up in the Pivot Viewer.
  2. A folder with the collection of images and some XML files to handle the images.
If you open the images folder, you will get to see the same architecture and structure as shown by the "Microsoft DeepZoom files" as it works the same way using the "Tile collection" of the images.


The Endnote.

So friends this was my cool experience with "Microsoft Pivot". The "Pivot Collection" i have mentioned in the above example and in the images contained images of size approx "1.5 MB" each. The folder of Images which i added to the collection is about "985 MB". This size of the Images in collection was shrinked to "221 MB". But that was also big n vast in size, so i didn't uploaded this collection to my Web Server.

I created another Pivot Collection to my Web Server which you have viewed through the above links.

I would soon blog about how integrating your Pivot Collection to the Silverlight Application and deploying it to your Local IIS or the WebServer.

Thank You for visiting the Blog.

Please leave your comments to help me improve my blog.

Aashish Singh Negi
aashish.negi@sitgeeks.com

Friday, October 9, 2009

Introduction to Expression Studio 3 ...............

.

All of you must have heard or read about the new Software Suite from Microsoft .... "Expression Studio 3" ...................

today i will introduce you all to the new Expression Studio and tell you the tools it provides .............

You can follow the above links to download the whole suite ...... students can get the full version Expression Studio using their DreamSpark accounts ..................

After you install the Expression Studio Pack ... you can get following tools or application in your start menu under Microsoft Expression.


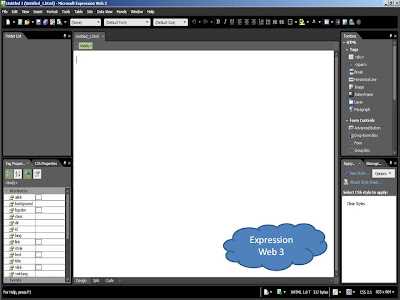
As you can see the list of following applications in the Microsoft Expression Folder ............


  • Expression Blend 3
  • Expression Web 3
  • Expression Design 3
  • Expression Encoder 3
  • Expression Encoder 3 Screen Capture
  • Expression Web 3 SuperPreview
  • Deep Zoom Composer.

Out of above aplications, DeepZoom Composer needs to be downloaded from Download Centre.

I am placing the screenshots of all these applications ... and brief overview of all of these.


I will soon provide an overview of each and every product ......

Saturday, August 29, 2009

A package of NEW TECHNOGIES ........

.

I haven't blogged from a long time ........

Now after attending the PUG DevCon on 8-9 th August, I cant wait about writing what i learnt there.

A whole set of new technologies .....

DevCon (Developer Conference) was organised by PUG (Pune User Group) sponsered by Infragistics and INETA. It was an awesome event.

There were variuos sessions on various technologies by Professionals.

Let me open the PACKAGE for U all and tell U what I learnt ......


  • AZURE CLOUD COMPUTING
  • SILVERLIGHT 3
  • RIA Business Application
  • ASP .NET MVC
  • JQuery

AZURE CLOUD CPMPUTING :

This is a nice technology from Microsoft to support the concept of cloud computing, The sessions were taken by Abhishek Kant (MVP Lead), Vikram RajKondawar and Monish Darda.

All of them cleared the concept about AZURE. All the doubts inmind about AZURE and CLOUD COMPUTING were cleared.

there is a lot of theorotical concept involved but seeing it practically or working on it LIVE is very nice experience.

U all can also visit Azure's WebSite and register for an account so that U can access the features of AZURE PORTAL.

I have also created a HELLO WORLD AZURE APPLICATION. U can visit it at http://aashishsinghnegi.cloudapp.net/


SILVERLIGHT 3 + SKETCHFLOW + RIA :

This is another latest technology from Microsoft. It all started with Silverlight 1.0 (XAML), then Silverlight 2.0 (XAML + C#) and now SILVERLIGHT 3.

Silverlight 3 can be said as a package of new features over the old Silverlight. You can download the latest Silverlight 3 Tools and Expression Studio 3 to make use of new features.

Expression Blend 3 + Sketchflow (Included In Expression Studio 3) comes with a new feature of SketchFlow.

Using Sketflow U can create a rough sketch of your application. U can manage the flow between the XAML pages. The rough SKETCH can be presented to the user and the suggestions of user can be saved and reviewed by the Developer.

Using RIA Services in the Silverlight 3 Application, we can create a business application very fast. It takes only 15minutes to create a database business application with built-in user management support.

Use of Domain Service makes it easy and fast to create a database rich application.

Vic Parmar (from Infragistics) showcased all new set of Silverlight UI tools. It was awesome.

ASP .NET MVC :

We all have been creating ASP .NET Web Applications and Web Sites. But now here we get a new feature MVC ( Model View Control ). Rahul Rajadhyaksha was the great mind to tell us about this. That was a little HiFi session for me but afterwards when i worked on it and created some Projects on it, it was very easy to understand.

I will blog about ASP .NET MVC sometime later when i get better hold of it.

JQuery :

This was also a HiFi session by Dhaval Faria. You can refer JQuery site to know more about it. I cannot blog about it right now as i haven't gone through it till now. What i think is that it will be nice using JQuery in our application to make it faster.


Thats al for now guys. I will be back blogging more on SILVERLIGHT 3.

Vikram Rajkondawar had one nice SILDE with him ...... WORDS OF WISDOM ...


" TECHNOLOGY has the POWER to ALTER REALITY !!! "

Saturday, April 18, 2009

DeepZoomPix - A New & Interactive Way to SHARE & EXPLORE Photos ...

.


Hello Friends ..... All of u have must seen the old DeepZoom Online Composer - "PhotoZoom".

Now the old service of Photozoom has been replaced by a newer one - "DeepZoomPix"

  • Go and visit DeepZoomPix WebSite to experience the new technology ....
  • You will get a Welcome Screen on this site ... Click On "Get Started"
  • SignIn with your Windows LiveID. If you have used the PhotoZoom service just signin with the same ID to get the previous albums you have uploaded.
  • Now you get a screen where you can see all your previous albums, add photos, etc
  • Click on any of the album or Click on "Add Photos" to add new photos.
  • After adding the photos just click on the Album you want to start with .
  • You will get a new screen "Deep Zoom View" . Just hover your mouse over the area where the Photos are shown and you will get a new window to customize the view of your photos.
  • You get an option of putting Tags to photos, Change the Layout, etc.
  • Click on "Share" to get a code you can add to your blog or your web page to embedd a DeepZoomPix control onto your site, blog, etc.

What are the key user experience features of DeepZoomPix?

Seamless navigation:
DZP enables the seamless exploration of albums of photographs. Users can navigate the photographs using mouse or keyboard and zoom into them to see them at their highest resolution. Users never wait to reload a page – the entire experience is fluid.

Layout options:
Arrange images in different ways including by in a calendar style view by date.

Dynamic filtering:
Tagged images can be filtered interactively with live updates to the displayed set of images and you can add your own tags to images.

Interactive slideshow:
Users can zoom into and pan around images while they are playing a slideshow. Slide timings are customizable and navigation can be controlled using the keyboard.

Import photos from the web:
DZP can access images stored in other services on the web. If you are a Facebook user, the DeepZoomPix Facebook application enables you import your public Facebook galleries into DZP. If you are a Flickr user, DZP can use the Flickr API to import your Flickr photos. Finally, if your photo service provides RSS feeds containing JPEGs, DZP can use those too.

Shareable mini-viewer:
Embed your slideshow in your blog or website, or send to a friend using the DZP mini-viewer.


What are the key architecture components of DeepZoomPix?

There are four main architectural components:

Image Ingestion:
Import images from the user’s local file system, Facebook, Flickr API or RSS feed. This takes place on the server.

Tile Processing:
Imported images are sliced into tiles for use by the Silverlight Deep Zoom technology.

Image Storage and Retrieval:
Tiles are stored as blobs using the Windows Azure Services Platform, specifically Windows Azure Storage.

Client Viewer:
Silverlight application for managing and viewing images.


Which technologies does DeepZoomPix use?

DeepZoomPix is a technology demonstration designed to show three technologies: use of Microsoft Silverlight to create a rich interactive UX for exploring images, the Silverlight Deep Zoom technology and Windows Azure Services Platform.


Goto DeepZoomPix FAQ to checkout more queries on DeepZoomPix.


*** DeepZoomPix is a technology demonstration that will be available until December 31st, 2009.


Get started by importing your own photos and prepare to be amazed!